So, you're thinking about putting up a chain link fence yourself? I see a lot of folks in Missoula try this, and honestly, it's one of those projects where you can save some money if you're handy and patient. But don't kid yourself, it's not just stringing up some wire. There's a right way to do it, and then there's a way that leaves you with a saggy, crooked mess. Let's talk about what you need to know before, during, and after you tackle this project.
Before You Dig: The Crucial Prep Work
First things first, you've got to plan. Don't just eyeball it, please. Get out there with a tape measure and figure out your perimeter. You'll need to know your total linear footage to buy the right amount of fence fabric, posts, and all the fittings. Sketch it out, mark where your gates will go, and decide on your post spacing. Typically, you're looking at 10-foot intervals for line posts, but always check your local codes or manufacturer recommendations.
Next, and this is absolutely non-negotiable: call 811 before you dig. Seriously. You really don't want to hit a gas line or a fiber optic cable, do you? It's free, it's easy, and it saves you a world of hurt (and potential fines). They'll mark out any underground utilities, usually within a few business days. While you're waiting for that, check with Missoula County's planning department. Some areas, especially in older neighborhoods like the University District, might have specific rules about fence height or setback lines. You definitely don't want to build a fence only to have to tear it down because you didn't get a permit or follow local ordinances.
Think about your soil too. Here in Missoula, we've got everything from river rock near the Clark Fork to dense clay in some of the valley areas. Digging post holes can be a nightmare if you hit a bunch of rocks. You might need to rent a heavy-duty auger or even a post-hole digger with a breaking bar if your ground is particularly stubborn. Don't underestimate the sheer physical labor involved in digging dozens of holes, by the way.
Getting Your Posts Right: The Foundation
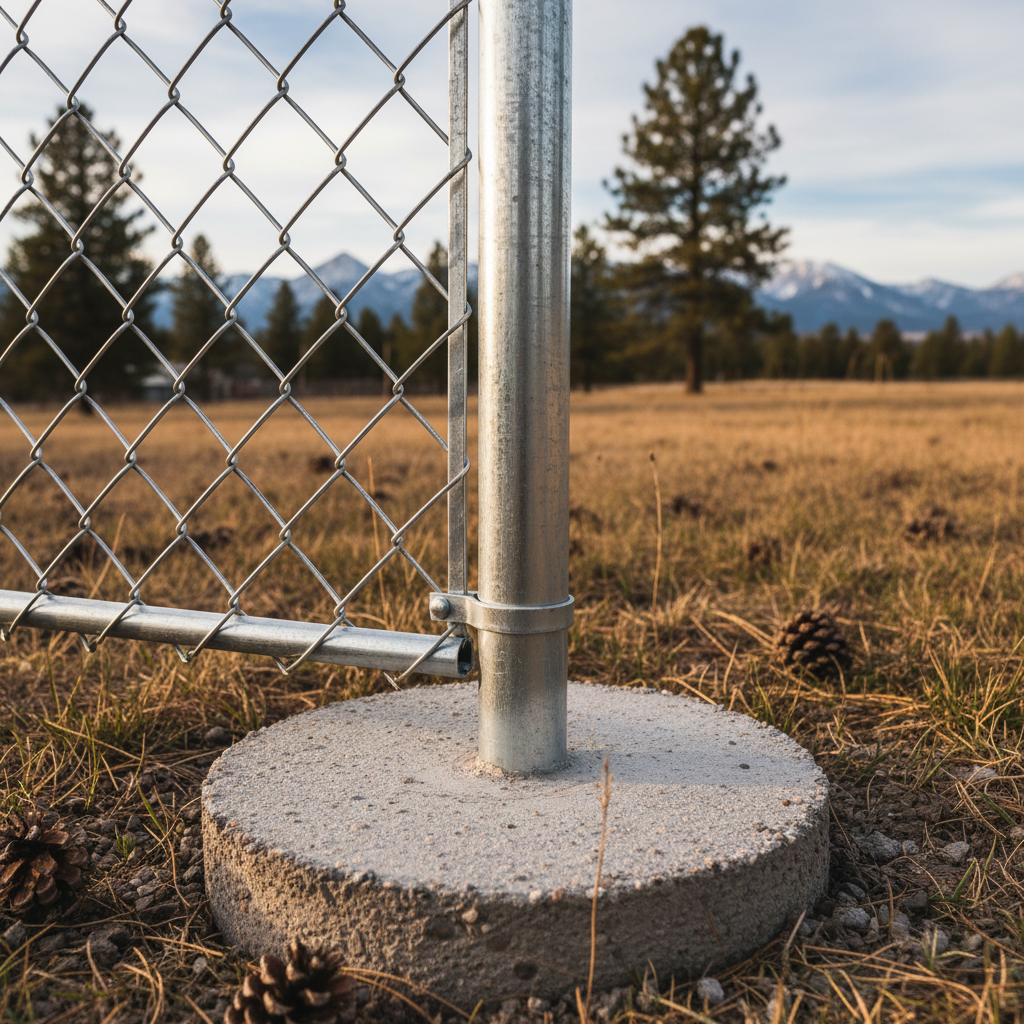
Your posts are the backbone of your fence. If they're not solid, your whole fence will be wobbly. You'll have terminal posts (corners, ends, and gates) and line posts. Terminal posts need to be heavier gauge and set deeper. I usually recommend setting posts at least 24-30 inches deep, and for terminal posts, go even deeper—36 inches is better, especially with our freeze-thaw cycles here. You want to get below that frost line to prevent your posts from heaving out of the ground over time.
When you're mixing concrete, don't skimp on the water, but don't make it soup either. You want a good, thick consistency. Set your posts plumb (perfectly vertical) using a level. This is where patience really pays off. Brace your terminal posts while the concrete cures – usually 24-48 hours – before you put any tension on them. Don't rush this part; it's the most critical step for a long-lasting fence.
Stretching the Fabric: The Tricky Part
Once your posts are solid, you can start attaching the fittings: tension bands, brace bands, and post caps. Then you'll run your tension wire (also called coil wire) along the top and bottom of your fence line. This helps keep the fabric taut and prevents sagging. Secure it with hog rings or tie wires.
Now for the chain link fabric itself. This is where many DIYers get frustrated. You'll unroll it and attach it to one terminal post using tension bars threaded through the fabric and secured with tension bands. Then, you'll stretch it to the next terminal post. This part often requires a fence stretcher tool, especially for longer runs. You want the fabric tight, but not so tight you're bending your posts. It should have a little give, but not sag between posts. If you're doing a long run, you might need a helper or two to get a good, even stretch.
Once it's stretched, secure the fabric to your line posts with tie wires, wrapping them around the post and the top and bottom wires of the fabric. Trim any excess fabric with fence pliers.
When to Call in the Pros
Look, I'm all for homeowners tackling projects, but sometimes you hit a wall. If you've got really uneven terrain, a lot of rock in your soil, or you're planning a complex layout with multiple gates and angles, it might be worth calling in a professional. Installing chain link, especially getting that fabric perfectly stretched, is an acquired skill. If you're not confident in your ability to get those posts plumb and the fabric taut, you'll end up with a fence that looks amateurish and won't last as long.
At Missoula Fencing Company, we've got the specialized tools and experience to get it done right, quickly, and without the headaches. We've seen it all, from steep hillsides out near Blue Mountain to tight property lines downtown. If you start digging and realize you're in over your head, or you just want the confidence that comes with a professionally installed fence, give us a call. We're happy to give you a quote and talk through your options. Sometimes, the cost of renting all the right tools and the time you save makes hiring a pro a pretty smart move.
After the Install: A Little Maintenance
Once your fence is up, it's pretty low maintenance. That's one of the big advantages of chain link. Just keep an eye out for any loose tie wires or bent posts, especially after a big windstorm or if you've got kids or pets that are rough on it. A quick fix can prevent bigger problems down the road. And that's about it. You've got yourself a sturdy, functional fence.